28 September 2012

Homemade Bubble Wands


We made some homemade bubble wands the kids have been smitten with for awhile now. I'd been meaning to make the classic metal hanger version, but then I decided to get out my metals box and try to make something a little more magical.


The kids had fun going through my stuff, picking out ribbon and pretty little things.


Using a pair of needle nose pliers, I twisted wire into star shaped wands, then threaded the beads and such they had chosen onto the stems. Beads that were too small for the wand wire, I put on smaller gauge wire and looped it loosely onto the wand so that they dangle freely like tassels.


I went over the stars with a hammer, forging them gives them strength so they will hold their shape. 


I tied ribbon on the handles, and gave them a couple jars of bubbles for some super magical bubble blowing.


Kaia particularly likes running with her wand, trailing bubbles... I had a hard time getting a picture of her even relatively in focus. :)


The wands are bigger than any they have had before, and they love the larger bubbles. Next time I will have to make some great big ones to dip in a dish!


Katalin concentrates so hard when she blows bubbles, it is really amusing to watch. She is so proud every time she produced a bubble!


They have had bubbles, but these little wands hold a whole new level of appeal for them, they have been bubbling constantly!

07 September 2012

{this moment}


Joining Soulemama's {this moment} - A Friday ritual. A single photo - no words - capturing a moment from the week. A simple, special, extraordinary moment. A moment I want to pause, savor and remember.
If you're inspired to do the same, leave a link to your 'moment' in the comments for all to find and see.

17 August 2012

{this moment}


Joining Soulemama's {this moment} - A Friday ritual. A single photo - no words - capturing a moment from the week. A simple, special, extraordinary moment. A moment I want to pause, savor and remember.
If you're inspired to do the same, leave a link to your 'moment' in the comments for all to find and see.

11 July 2012

All Natural Homemade Laundry Soap

People tend to be amazed when they find out I make our laundry soap. They roll their eyes when I insist that it is super, super easy to do. This is undeserved. It really and truly is very simple. It takes just a few minutes to throw together. It is also quite inexpensive, especially compared to buying laundry soap, and even more so if you have been footing the bills for the expensive, chemical-free all-natural stuff. Even a 4 year old can do it. Seriously, I'll show you. I have found it to work just as well as the soaps I had been buying and have never had the slightest inclination to go back. You'll be making your own in no time, and wondering why you didn't start sooner.


It takes just three ingredients, four if you want to scent it.
  • Castile Soap
  • Washing Soda
  • Borax
  • (Optional) Essential Oil
We'll start with soap. Many people use Fels Naptha, however, it contains animal ingredients, which we do not use. Dr. Bronner's makes pure castile soap bars, as do many other companies and people. Use whichever you wish, but be careful of added oils and butters. While those types of ingredients are nice for your skin, they are not the greatest for your laundry. I buy mine at a local shop - Tree Huggers - pre-grated. It's nice and easy, but a bit pricier than grating it up yourself. It you can find it grated and want to pay for it, terrific, otherwise, you just grate up the bar. I will soon be joining the grate-your-own club, I hope to make my first batch of soap soon, and would like to use that for my laundry as well. Borax and washing soda (note: not baking soda,) can both be bought in the laundry section of many grocery stores, or online. (Notes on the ingredients at the end of the post.)


Pour all three ingredients in more or less equal parts - 1/3 soap, 1/3 washing soda, 1/3 Borax - into a bowl and mix them together. You can adjust that to your liking, I tend to go a bit heavier on the Borax and washing soda, myself. My kids are dirty, what can I say. Okay, fine, I am pretty messy myself. That's how you know you've been having fun... right?


Once your ingredients are mixed, add essential oils if you would like. You only need a few drops, and it really is just to scent your soap. If your laundry is coming out smelling like the scents you used, you may want to go a bit lighter, you don't actually want the oils lingering through the wash. In our latest batch we added lemongrass and eucalyptus oils and they smelled divine together! Many people use tea tree oil for its antibacterial, antifungal, antiviral, and antiseptic properties. I agree, I just can't resist changing things up and trying new scents.


Stir the oils in well...


And your soap is ready to use! That's it. Use two tablespoons per load for standard washing machines, and two teaspoons a load for HE (high efficiency) machines. It is low sudsing, and you can add two tablespoons to HE machines, as well, if you desire. It is also safe for septic tanks. I told you it is easy. My little ones love making the laundry soap, all I have to do is make sure they take turns adding and stirring, because otherwise they will quarrel over who gets to make it. I store mine in a glass jar with a screw on lid, and even found a convenient two tablespoon scoop to keep with it as well.


It is possible to make this recipe in liquid form, but I have never seen the point, myself, as it works the same and adds more steps and time to the process. If that's what you fancy, however, here is a site that tells you how to do it. It also has a detailed cost breakdown.
_______________________________________________________________________________

*A couple notes on the ingredients. First of all, just because the ingredients are all natural doesn't mean you should eat it. I just want to be clear about that, you never know. You would probably be ill if you decided to chow down on this laundry soap, and I don't think it would taste very good, either. 

So, what the deuce is Borax? Or washing soda, for that matter! (I have always thought that Borax sounds scary.)

Well, washing soda, also known as soda ash, is sodium carbonate, a sodium salt of carbonic acid. It is commonly used as water softener, and while it can be extracted from the ash of plants, commercially it is produced from salt and limestone.

Borax, or sodium borate, is a naturally occurring mineral that has been used for thousands of years, and for an incredibly diverse array of uses, from preserving food and mummies, to glazing pots, and beyond. It is mined from the ground, and is still used for a variety of household needs. It is generally accepted as a "green" substance. More on Borax can be found here.

**I am not a scientist, or an expect on the subject by any means. This is what I understand these ingredients to be. I wouldn't bet a million dollars on it, even if I had a million dollars, but I am reasonably sure of myself. Please do feel free to correct me if I am wrong.

04 May 2012

Beltane

We had a lot of fun celebrating Beltane this year! It was a lovely warm day after a lot of chilly days, and we made our lunch a picnic. We made flower crowns which the girls adored and wore for days, despite the flowers being dead and dry come the next morning. Last year, we made dandelion chain crowns, which are fun and pretty, but fall apart fairly easily. This year I used grape vine, and they were sturdy through all the taking off, putting on, running around with, and general rough usage.
 

We also erected a smaller maypole from a downed branch, instead of trying to use the huge pole again, it was the perfect size for my little misses. They had a blast dancing the ribbons around the maypole.


(Little Katalin is recovering from a mighty tumble in which she attempted to take her face off.) We made some simple may baskets: paper rolled into a cone with a ribbon handle. The girls decorated them with flowers cut from the scrap paper, and collected all the flowers they could find around our home. I cut the corners off a plastic sandwich bag to tuck inside so that their flowers could have water to stay beautiful.


I had pulled this wooden box out from their Grandpa's scrap pile, and they painted it up to plant their herb garden in.


We spent most the day outside enjoying the sunshine and fair weather. It was a wonderful day, and I am so happy to be welcoming the Spring back to us.

20 April 2012

{this moment}


Joining Soulemama's {this moment} - A Friday ritual. A single photo - no words - capturing a moment from the week. A simple, special, extraordinary moment. A moment I want to pause, savor and remember.
If you're inspired to do the same, leave a link to your 'moment' in the comments for all to find and see.

16 April 2012

Children's Art to T-Shirt

Early April was Papa Juise's Birthday, and we ignored the pressing matters of Spring for awhile to make him some gifts with our hands and our hearts. One of those was a T-shirt, made with Kaia's art, and I have to admit, I am kind of jealous. We yet again used the freezer paper method of printing, and I fell in love with it all over again! Aside from the onesies that I made for Kaia as a babe, we did some freezer paper printing together last year, which I think I failed to post anything about. Oops? Anyway, it is easy, and fun, and very rewarding, here is how we did ours.

 
I taped freezer paper to the table for Kaia to draw on, shiny side down, so that the papery side is the drawing surface. I drew boxes on each of them as guidelines for Kaia to stay within so that I would be left with a border on the pictures. I explained to her that I would need to have some paper all the way around her drawings in order to put them on Papa's shirt, and asked her to try to keep her drawings inside those boxes. Then I handed her a Sharpie. Okay, fine, you do not need to give your child a Sharpie if you do not want to, but the thick, bold lines were nice when it came time to cut them out, and the shiny side of the freezer paper doesn't let it bleed through. At least, ours didn't. I don't want to be responsible for your fancy dining table or anything.


When she was done drawing, I started the iron warming, pulled some paperboard out of the recycling, and got to work with my exact-o blade. I'm sure you could probably pull it off with scissors, but I wouldn't want to try. This is a job for the razor. Next you want to cut all the positive space out of the drawings, leaving the negative space intact. That is to say, you want to cut all drawn lines out of the background, and it is okay if you dice those lines up, but the background itself is what you are going to use as your stencil, so don't cut into it. If that seems confusing, hopefully the next few pictures help clear it up. I cut first around the outside borders of her pictures, and used those to decide where to place the images on the shirt.


In the picture on the left you can see that the empty space forms the lines of the drawing, and in the picture on the right you can see the parts which are being removed. I still have the top half of the face to cut out and iron to the shirt in this picture, but the rest is chaff. I did not bother trying to cut out eyes, little noses, or belly buttons, because those are much easier to dot on later than to cut out of the stencil.


I ironed the pieces in place as I cut them out, mostly because some of the pictures needed to be cut into a handful of pieces and I didn't want to lose track of where they all went. The simplest one was done in two pieces, and I think the most any of these had to be cut into was seven.


Iron the freezer paper shiny side down for about 15 seconds. It will stick to the surface of your cloth. Make sure the edges are all adhered, and then you are ready to paint. Place another piece of freezer paper, cardboard, or something of the like, inside your shirt to keep the paint from bleeding through the back layer. I used screen printing ink, but I have in the past used acrylics. I found that mixing the acrylic with a little water made the end product much softer, and helped it last longer. Either way, though, eventually acrylic will begin to crack, especially over large areas.


Dab the paint in. You want to get the lines filled in, but you don't want to leave globs of paint on the shirt, or have thick layers. Use just enough to give a solid coat, then lift any excess paint back off with your brush. Be careful not to paint over the borders of your stencils, or any areas you wish to be a different colour.


Wait for the paint to dry completely. No, seriously. Be patient. Waiting for the next day would be best. I have messed prints up before because I decided the paint was "dry enough", it's not worth it. Once the paint has set, peel off the freezer paper. It comes up very easily. For eyes, noses, and bellybuttons, I trimmed the swab part off a cotton swab and used the stem to dot paint on in the appropriate places. I found it useful to have taken pictures of the drawings beforehand that I could reference in getting the details in the correct positions. For smaller needs, I used a toothpick.


I think it came out super cute, and Papa Juise loved it! Kaia pretty much wants him to wear it every day and doesn't quite understand why he won't. She's ready to make another, and I don't think it will be long.

13 April 2012

Spring


Hello all, dropping by to say hi, and that, yes, we do still exist. It has been a very busy season for us, I have a few projects that I would like to get up very soon as things should be slowing down a bit around here. Here is an update on our lives for those that may be curious.


 We have been doing a lot of work preparing beds, starting seeds, cleaning the chicken coop, and "clean up" through the woods on our property as well. My have we got a huge burn pile!


The kids are very happy to be getting their hands back into the soil, as am I. It feels good to be turning the earth, and nestling our little seeds in. They are planted with such love and tenderness, and carry with them so many hopes.


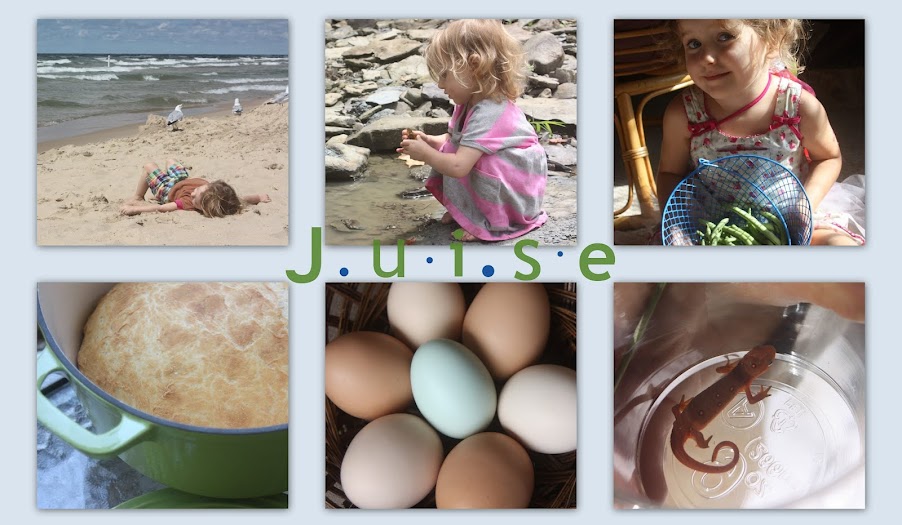
The children got to dye Easter eggs for the first time this year, which was very exciting for them. (For those that do not know, we have been vegan, and still adhere to a vegan diet with the exception now of eggs from our own backyard flock of free-ranging, organic-fed chickies.) I was not sure how well our brown and cream eggs would take the colour, but they came out beautiful. It was fun to see the different colours the eggs came out when they were put into the same dye bath, but started as different shades of brown. I hope next year to use natural dyes, but, oh! Things have just been so busy, I actually picked up your standard nasty store bought dyes. Chalk one up against me. The next morning, while admiring our colourful eggs, Kaia told me, "You know, Mom, we didn't dye our eggs." I replied that, gosh, I thought we had, to which she responded, "No, my chickens lay rainbow eggs." Ha!


We are putting in one nice, big plot for our veggies this year. Up until now, we have been growing them in many small beds all around the house. I am very excited to be getting them all in one, big, easily rotatable, more protectable bed! Winning that bed from the dune grass, though... not as exciting. This is where it is going, in this picture I have started laying down sheets of old cardboard and plywood to smother the dune grass, I will post another picture when I get all the layers down. We are trying a "lasagna" style garden, so it will have many layers, which it is going to need since this is all sand under the dune grass.


I put down a layer of our "hot" compost first, and that is going to have a layer of mulch over it. Then some greens, then straw, then our not-so-hot compost, and finally, topsoil. The long strip of cardboard pictured was once Kaia's boat, I think this is a good final resting place for it.
 

I have also been busy with six new chicks. First I built a "tractor" for them, (which is basically a chicken coop and run that you can move around.) I didn't get quite finished painting it before it was time to pick up the chicks, but they have not complained yet. I also had to put up a quarantine fence to keep them separate from our older chickens, and that was a lot more work than I thought it would be!


Here they are in the box we brought them home in. They are all very sweet, and quite cute, and they all became ill. Not so "yay". I am very glad that we did quarantine them, so the risk to our older birds is as minimal as we can make it. Now I just have to jab a swab down a few of their throats and overnight it to the lab to find out what ails them, which I am so totally looking forward to. Fingers crossed that it is an innocent infection and inconsequential. (Oh, pleaaassee!)


Here is Katalin holding one of the little Leghorns when we picked them up, the girls are both overjoyed with them. The two Leghorns were all Kaia's idea, she sees white eggs everywhere, but the only eggs she has ever had are ours, so she thinks white eggs are really rare and special, hehe. So these two will add some white eggs to our baskets. The two brown stripey chicks are Araucanas, and will lay blue, green, or pink eggs, as will the little black Easter Egger. The speckled black one is a mutt of some sort, and we will just have to wait and see what she becomes. Unless, of course, they are hes. It is fun to wait and wonder! Our big (chicken) girls have also been enjoying the warmer weather, and the grass, and other greens and availability of bugs to scratch up.


We have managed to nab some free time amidst all the work and bustle, and have been enjoying hikes, picnics, and generalized exploration of the world, as well. We've even done a handful of crafts, I swear. I just haven't yet had the time to share them, which I will be trying to get to this week.


Thank you for stopping by, my next post will be more along the normal lines of crafting with children, in the meantime, be well!